How to Restore Old Photos With AI, From Scan to Print

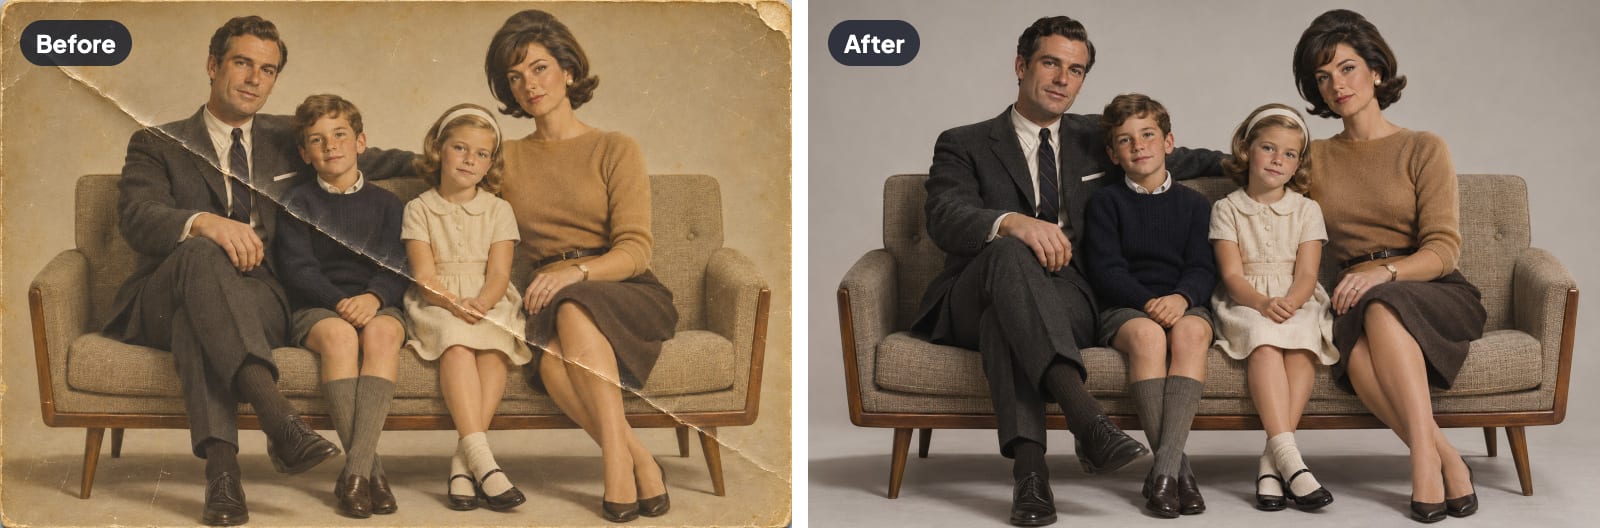
If you've ever opened an old box of family photos, you know how much damage the years can do. Colors fade to pink or yellow, corners bend, and some pictures have deep creases or tears right across someone's face.
You don't need a professional studio to fix most of this damage. You can scan the photo at home, repair the scanned copy with an AI tool, and keep the original print safe in a cool, dry place. The old print never gets touched during the repair.
In this guide, we'll show you how to restore old photos step by step, from scanning them the right way to repairing damage, fixing faded color and storing the originals safely.
What Happens to Old Photos Over Time?
Three things cause most of the damage, and each leaves a different kind of mark.
Damp air. Moisture is the biggest enemy of old photos, according to the Library of Congress guide on caring for photographs. When the air is damp, the surface of a photo turns sticky. That's why prints get stuck to frame glass and album pages. Damp air also causes mold and makes the paper curl. Attics and basements are the worst places to keep photos, since they get damp in summer and dry in winter.
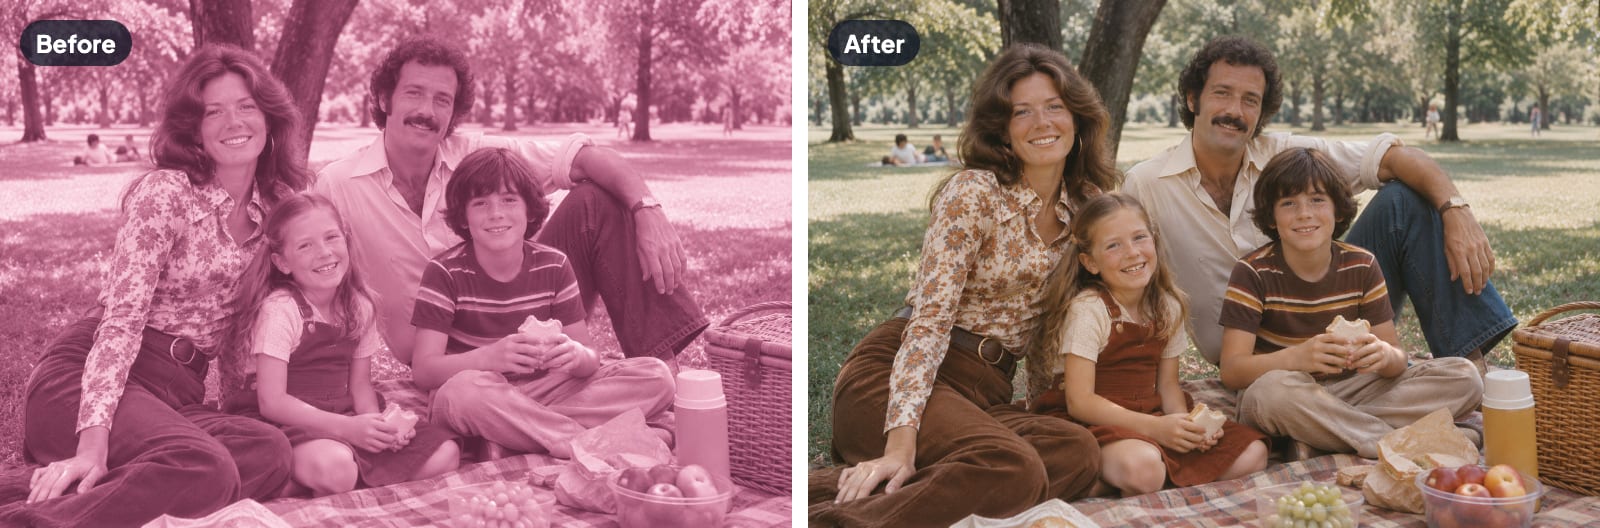
Light and time. Color photos are made from three layers of dye, and each dye fades at a different speed. The Image Permanence Institute explains in its Graphics Atlas that the blue-green dye fades even in a dark drawer, which leaves the photo looking pink. Sunlight fades the red dye faster, which turns a photo blue or green instead. That's why so many photos from the 1950s to the 1970s look washed out and rosy today.
Handling. Fingerprints, folds, tape, paper clips and pen marks on the back all leave damage behind. One hard fold can crack a photo's surface for good.
Once a print fades, nothing can restore the color on the paper itself, so every repair happens on a scanned copy, with no risk to your original photo.
| Damage | What it looks like | Aragon tool that fixes it |
|---|---|---|
| Dust and scratches | White specks, thin bright lines | Photo Restoration |
| Creases and tears | Sharp lines, cracked areas, missing corners | Photo Restoration |
| Stains and water spots | Brown rings and blotches | Photo Restoration |
| Fading | Washed-out colors, gray instead of black | Photo Restoration, then Color Correction |
| Color cast | Pink, orange, green or blue tint over everything | Color Correction |
| Blur | Fuzzy faces and edges | Unblur Image |
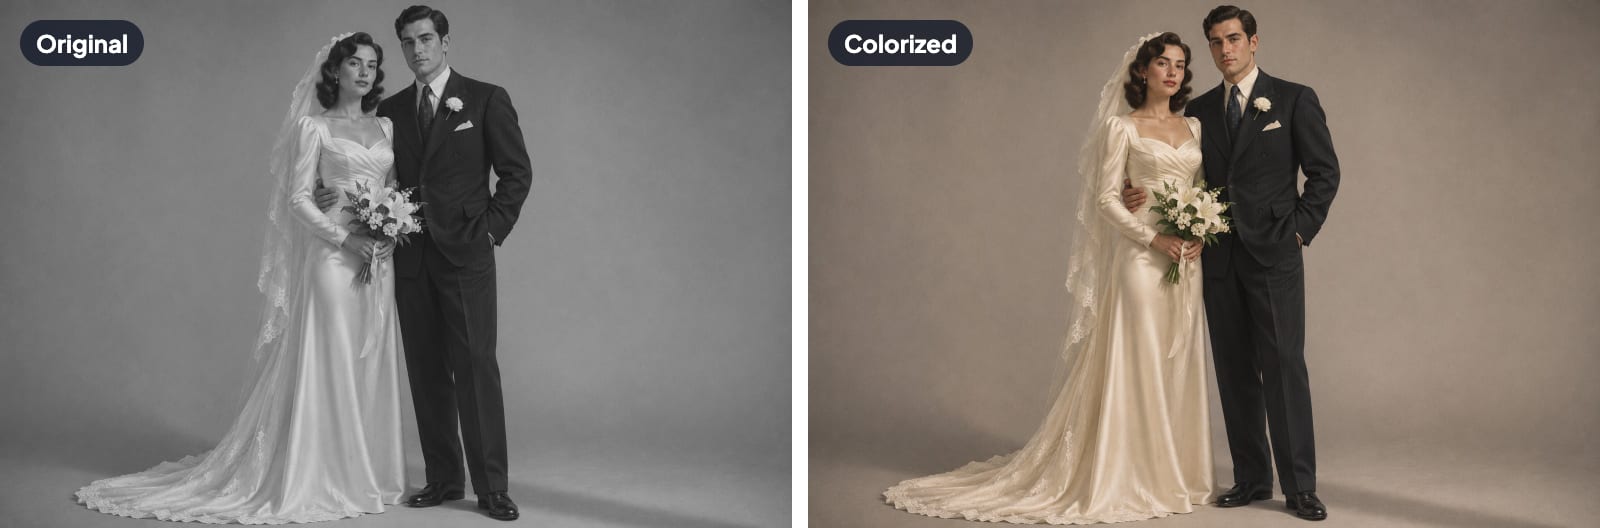
| No color at all | Black and white or brown-toned print | Image Colorizer |
How to Restore Old Photos, Step by Step
Here's how to restore old photos at a glance. Each step has its own section below.
- Handle and clean the print safely.
- Scan it at the right settings.
- Repair scratches, creases, tears and stains with AI.
- Fix faded color and contrast.
- Add color to black and white photos, if you want a color version.
- Sharpen and enlarge the photo for printing.
- Store the original and back up every file.
The AI steps take minutes. Steps 1, 2 and 7 need the most care, because no software can fix a torn print or a poor scan.
Step 1. Handle and Clean the Print Safely
Old prints break and scratch more easily than you'd expect. Set up a safe workspace before you touch the first photo.
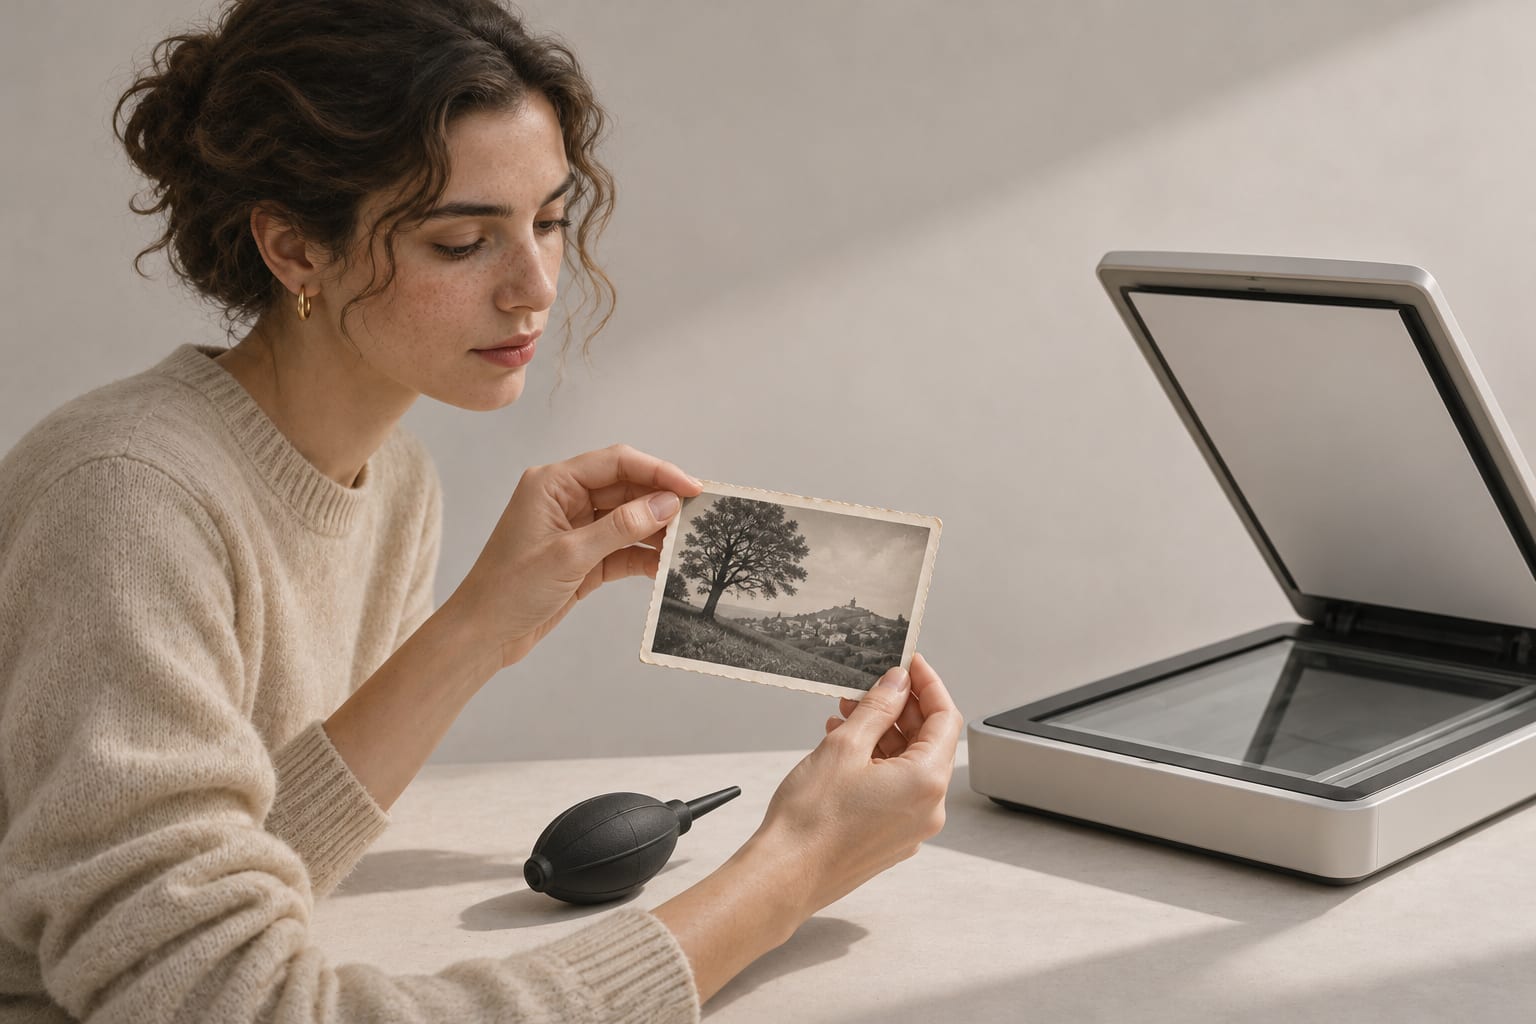
Wash and dry your hands first, or wear clean gloves. Hold each photo by its edges, and keep your fingers off the picture. Work on a clean, dry table with no food or drinks nearby.
To clear off dust, use a small rubber air blower, the kind sold for cleaning camera lenses. Skip canned air and brushes, since the Library of Congress warns that both can scratch a photo's surface. Leave stains and dirt alone for now. Water and cleaners can lift the picture right off the paper, and the AI tool will remove stains from the scan in Step 3.
If old tape or glue is stuck to a photo, leave it in place. Pulling it off can rip the paper or tear away part of the picture.
What If the Photo Is Stuck to Glass or an Album Page?
Don't try to pull it free. Take the frame apart and lay the glass and photo together on your scanner, with the glass facing the scanner bed. You'll get a usable copy without putting the photo at risk.
Old sticky albums cause the same problem. If a photo lifts off the page easily, move it into a photo-safe sleeve. If it won't come loose, scan the whole album page and leave the photo where it sits. A photo conservator can often free stuck prints safely. You'll find tips on finding one in the conservator section of this guide.
Step 2. Scan the Photo at the Right Settings
Your scan decides how good the final result can look. AI can only work with the detail it receives, so a sharp, high-quality scan always restores better than a quick, blurry scan.
Flatbed Scanner Settings
Wipe the scanner glass with a soft, dry cloth before you start. Any dust left on the glass shows up as extra specks in your scan.
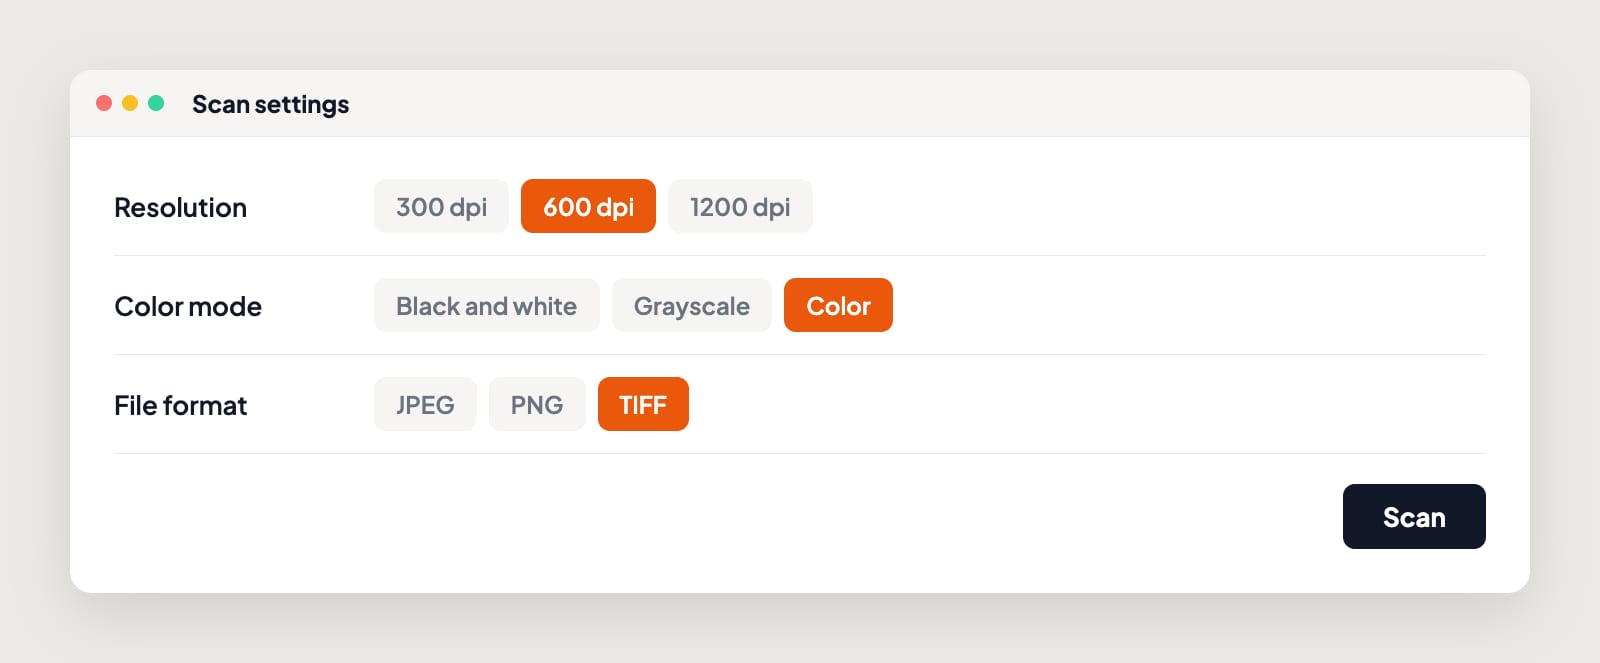
Next, set the resolution. Family Tree Magazine's scanning guide recommends at least 600 dpi for photos, and up to 1,200 dpi if you plan to make a bigger print. Small photos, like wallet-size prints, also need 1,200 dpi. DPI stands for dots per inch, and a higher number captures more detail.
Here's what those numbers mean in practice. A 4x6 photo scanned at 600 dpi gives you an image of about 2,400 by 3,600 pixels, so you can print it at 8x12 inches without scanning the original a second time.
Three more settings make a real difference.
- Scan black and white photos in color mode. Color mode picks up the warm brown tone of old paper, and that extra detail helps the AI tell stains apart from the picture.
- Turn off auto sharpening and auto color in your scanner software. Let the AI tools make those fixes on a clean, untouched scan.
- Save your main copy as a TIFF file. TIFF files keep every bit of detail, while JPEG files throw some away each time you save. Make JPEG copies for uploading and sharing.
Scanning With Your Phone
No scanner? Your phone can do the job. Lay the photo flat near a bright window, out of direct sun, and hold your phone straight above the photo. A tilted phone stretches faces into odd shapes.
Shiny photos reflect light, so glare is the biggest problem with phone scans. Photo scanning apps fix this by taking several shots from slightly different angles and combining them into one clean image. Phone scans work fine for sharing and for most AI restoration. For a photo you want to print big, a flatbed scanner captures more detail.
Name and Label Your Files
Name each file by date first, like 1968-07_Ruth-Miller_Lake-Tahoe_01.tif, so your photos sort in order. Then add names, places and dates to each file while the people who remember are still around to help. A restored photo of an unnamed stranger means a lot less to the next generation.
Step 3. Repair Scratches, Creases, Tears and Stains With AI
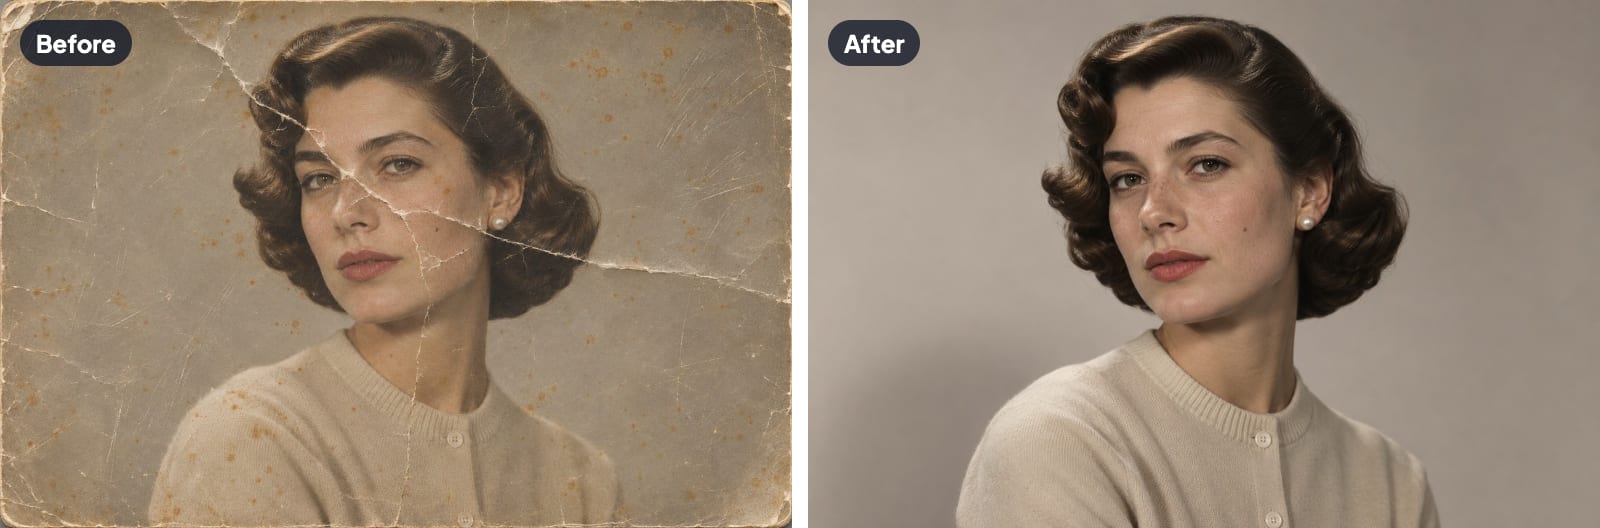
An AI restoration tool looks over the whole photo, spots damage like scratches, creases, stains and faded patches, and fills each damaged area using the surrounding detail. A repair that used to take a retoucher hours now takes about a minute.
How to Use Aragon's Photo Restoration Tool
Aragon's Photo Restoration tool repairs damage and brings back faded color in old photos. Here's how to use the tool.
- Upload your scan. Sign in to Aragon and upload the JPEG copy of your scan. You can upload several photos at once.
- Run Photo Restoration. The AI finds creases, scratches, stains and faded areas and repairs every one automatically.
- Review and download. Compare the result with your original scan, then download the restored photo.
Like any AI tool, Photo Restoration does its best work on light to moderate damage. If a big piece of the photo is missing, like most of a face, the AI may not be able to rebuild the whole area. A clear, sharp scan from Step 2 gives the tool the best chance of success.
If you'd rather describe what to fix, like "remove the crease across her face and warm up the colors," Aragon's Quick Chat Editor handles both changes in one conversation.
Check the Result Before You Save
Zoom in close and check the eyes, teeth, hands and any writing in the photo. Faces matter most, because even a small change to an eye or a smile can make someone look like a different person.
If a small spot is still there after restoration, Aragon's Magic Eraser lets you describe it, like "white speck on the sleeve," and erases just that spot. For specks and marks on a face, Aragon's Blemish Remover clears them away and keeps skin looking natural.
Step 4. Fix Faded Color and Contrast
Fading makes a photo look flat. Blacks turn gray, whites turn cream, and the whole picture looks dull. Old color photos often pick up a tint on top of that, usually pink, orange or green.
Photo Restoration already brings back faded color as part of its repair. If your photo still looks too pink, too orange or too dark, run it through Aragon's Color Correction tool. The tool fixes brightness, contrast and color balance automatically, so whites look white again and skin looks natural.
To check the result, find something in the photo that should be plain white or gray, like a shirt, a wall or a sidewalk. If that area looks neutral, the rest of the colors are usually correct.
Keep the colors gentle. People's skin in the 1960s was never neon, and colors that are too bright make a restored photo look fake.
Step 5. Add Color to Black and White Photos
Adding color is optional, and it's a different job from restoring. Restoring brings back how a photo once looked. Colorizing adds color the original photo never had.
Aragon's Image Colorizer adds realistic color to black and white photos. The AI recognizes skin, sky, grass, clothes and backgrounds, and picks natural colors for each one based on the scene and the lighting.
Keep in mind that any colorizer is making a smart guess. It can't know that a car in the photo was dark green or that a dress was blue. Ask your family what they remember, and enjoy the colorized version as a fresh way to see the photo rather than an exact record.
Two simple habits keep your collection accurate. Always keep the black and white original, and save the colorized version as a separate file with "colorized" in the name. That way, anyone who finds the files later can tell which one is the real photograph.
Step 6. Sharpen and Enlarge the Photo for Printing
Always sharpen and enlarge last. If you make a photo bigger first, every scratch and speck gets bigger along with the picture.
Many old photos were a little out of focus from the day they were taken, especially snapshots from cheap cameras. Aragon's Unblur Image tool sharpens fuzzy faces and edges and brings back lost detail. The photo gets clearer but still looks like a real old photo, not an over-edited picture.
Want to know if your photo is big enough to print? Divide its pixel size by 300, the number most photo labs use for sharp prints. A photo that measures 2,400 by 3,600 pixels prints well at 8x12 inches. If your scan comes up short, Aragon's Image Upscaler makes the photo bigger so it still looks sharp at a larger print size.
Step 7. Store the Original and Back Up Every File
A restored file doesn't replace the original print. Look after both, or you'll be restoring the same photo all over again in twenty years.
How to Store the Original Prints
The Library of Congress recommends a cool, dry spot that stays about the same all year. That means indoor humidity between 30% and 50%, a temperature of 70°F or lower, and as few big swings as possible. Keep photos out of attics, basements and garages, and away from outside walls, heating vents and fireplaces.
The same guide also recommends:
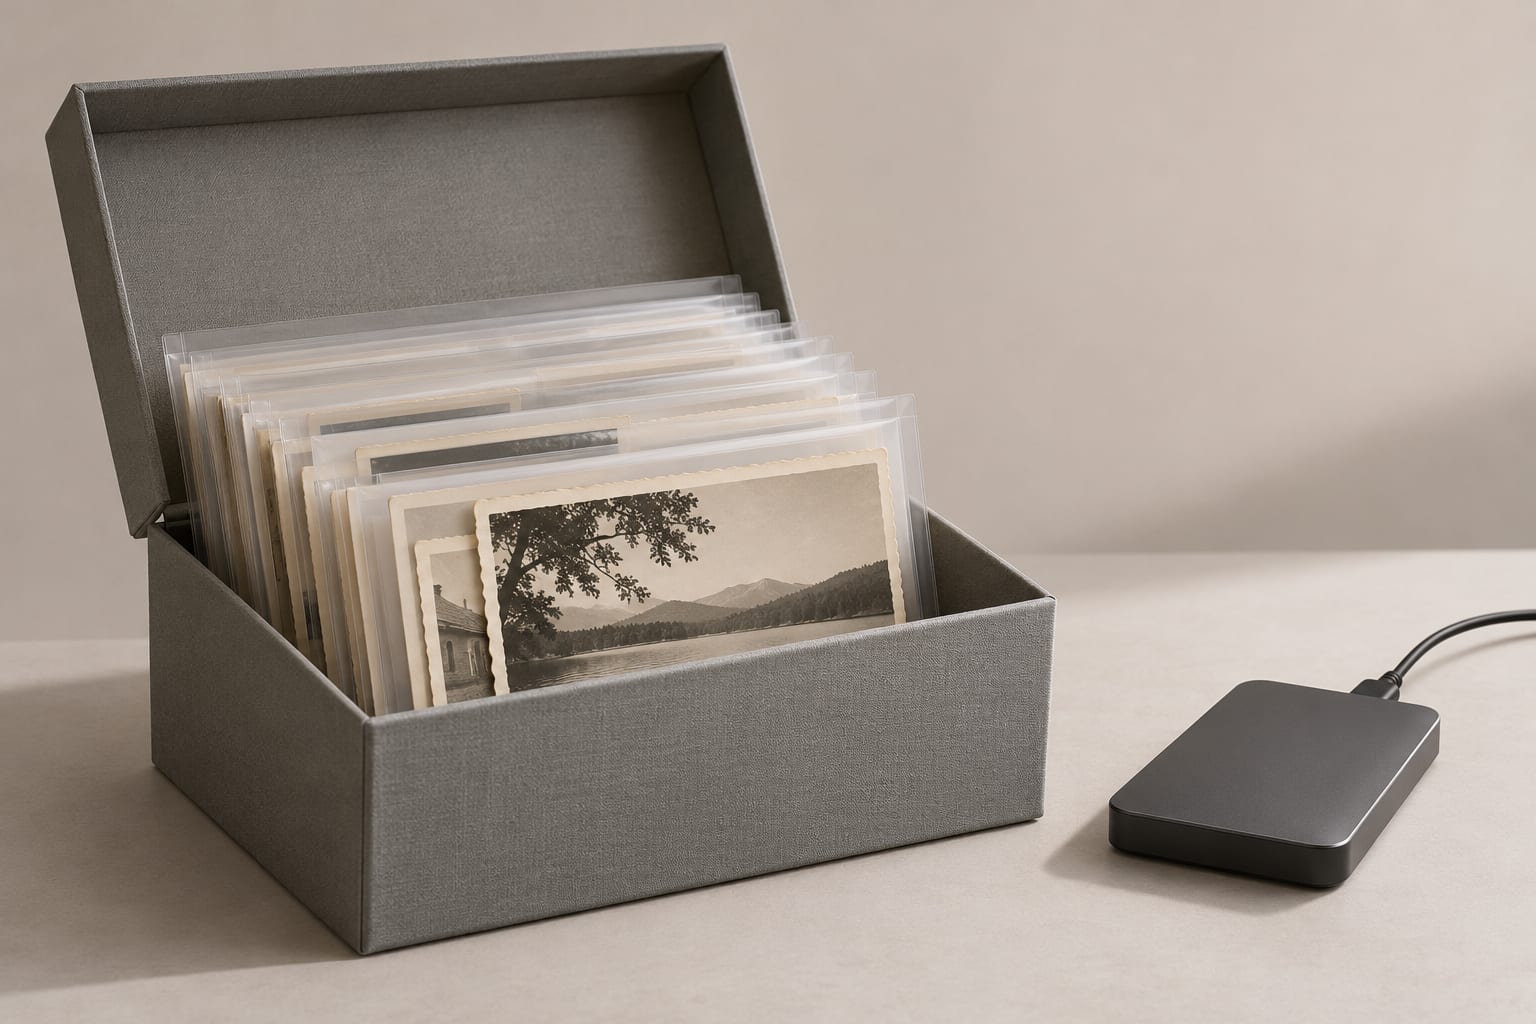
- Use photo-safe sleeves and boxes. Look for products labeled as passing the Photographic Activity Test (PAT), a lab test that checks whether storage materials are safe for photos.
- Avoid sticky "magnetic" albums, since their pages slowly damage photos.
- Store negatives apart from prints, because some older negatives give off gases that harm nearby photos as they age.
- Keep color photos and negatives somewhere cold if you can. Temperatures of 40°F or lower slow down fading a lot.
- Keep originals out of the light. Put restored copies in frames and keep the originals in a box, especially in sunny rooms.
How to Back Up the Digital Files
Use the 3-2-1 rule. Keep three copies of every file, on two different kinds of storage, with one copy in a different place. Your computer, an external hard drive and a cloud backup cover all three.
Open a few files from each backup once a year to make sure every copy still works. Sharing copies with the rest of your family helps, because every extra copy in another home is one more backup.
How to Share Restored Photos With Family
Print your favorites at a photo lab using the TIFF or a high-quality JPEG. Put your best restorations in a printed photo book for a reunion or a big birthday. Load them onto a digital photo frame as a gift, which lets everyone enjoy the photos while the originals stay safe in the dark.
You can even turn a restored portrait into a short video clip. With Aragon's Image to Video tool, you upload a photo, describe the movement you want (a slow smile or a slight turn of the head), choose a model and create the clip, then edit and export the final video. The movement is made by AI, so let people know the clip is an animation when you share the video.
When to Call a Professional Photo Conservator
AI restoration fixes how a photo looks on screen and in new prints. It does nothing for the old paper print, and some originals need hands-on care from a trained expert called a conservator.
Call a professional when a photo is stuck to glass and won't come loose, shows signs of mold, has a surface that's flaking or peeling, or is a very old photo on metal or glass, such as a tintype. The same goes for any one-of-a-kind photo you can't risk losing. The American Institute for Conservation has a free directory for finding a conservator near you.
Once a conservator makes the print stable, you can scan the photo and restore the copy with AI like any other picture.
Mistakes That Make Restored Photos Look Fake
A good restoration looks like the original photo on its best day, not a brand-new picture. Watch out for these common mistakes.
Smoothing faces too much. Too many touch-ups make people look like wax figures. Leave a little film grain in place, because that grain is part of what makes an old photo feel real.
Keeping details the AI made up. When a large area is missing, the AI fills the gap with its best guess, and that guess can change a face. If someone looks like a stranger after restoration, go back to your original scan and try again with a cleaner, sharper copy.
Making colors too bright. Strong, bold colors on a 1950s snapshot look wrong. Aim for the soft, slightly muted tones that film actually produced.
Saving over your original scan. Always upload a copy. Your untouched scan is the one file you can never replace if the print gets lost.
Saving JPEGs over and over. A JPEG loses a little quality every time you save the file, so a photo saved ten times as a JPEG looks worse than your TIFF original, even though no single save seems to hurt. Keep the TIFF as your main copy, and make fresh JPEG copies from that file whenever you need a JPEG.
Start With the Photo That Matters Most
Start with the print that matters most to your family. Handle it with care, scan it at 600 dpi or higher, let AI repair the damage and fix the color, and back up the result in three places. Once you finish the first photo, the rest of the box goes much faster. Photo Restoration, Color Correction, Image Colorizer and Unblur all come with one Aragon plan.
When you're ready, upload your scan to Aragon and restore your first old photo.
Related Aragon Tools
- Photo Enhancer improves the overall clarity and quality of a photo after restoration.
- Image Extender adds more space around a photo that was cropped too tightly.
Related Reading
- Why Your Photos End Up Blurry and How to Unblur Them
- The Best AI Image Generator in 2026, 9 Top Tools Compared
FAQs About Restoring Old Photos
How can I restore old photos for free?
Scan the photo with your phone or a scanner at your local library, then upload the scan to an AI restoration tool. Free credits come with your Aragon account, so you can restore your first photos before you choose a plan.
Can AI restore damaged photos?
Yes. AI handles scratches, creases, stains, dust and fading well. It has a harder time with large missing pieces, especially faces. Zoom in and check every result before you save the file.
How do you restore a faded photo?
Scan the photo, run the scan through Photo Restoration, then use Color Correction if a pink or orange tint remains. The faded print itself can't be fixed, but the restored copy can look close to how the photo looked when it was new.
What resolution is best for scanning old photos?
Use 600 dpi for regular photos. Go up to 1,200 dpi for small photos or any photo you plan to print bigger.
Is it better to scan the negative or the print?
If the negative is still in good shape, scan the negative. Negatives usually hold more detail than the prints made from them, and they often skip the scratches and fading the print picked up over the years. You'll need a film scanner, or a flatbed scanner with a film adapter, to scan negatives at home.
Will restoring a photo damage the original?
No. AI restoration works on a scanned copy, so your print never gets touched. The only risk to the original comes from handling and cleaning, which is why Step 1 matters so much.
Should I take old photos out of magnetic albums?
Yes, if they come out easily. The Library of Congress advises against magnetic albums because their sticky pages slowly damage photos. If a photo won't come loose, scan the whole page and leave the photo in place. Forcing it can rip the paper, and a conservator can often free stuck photos safely.